Montessori Flower Arranging: A Classic Work at Home
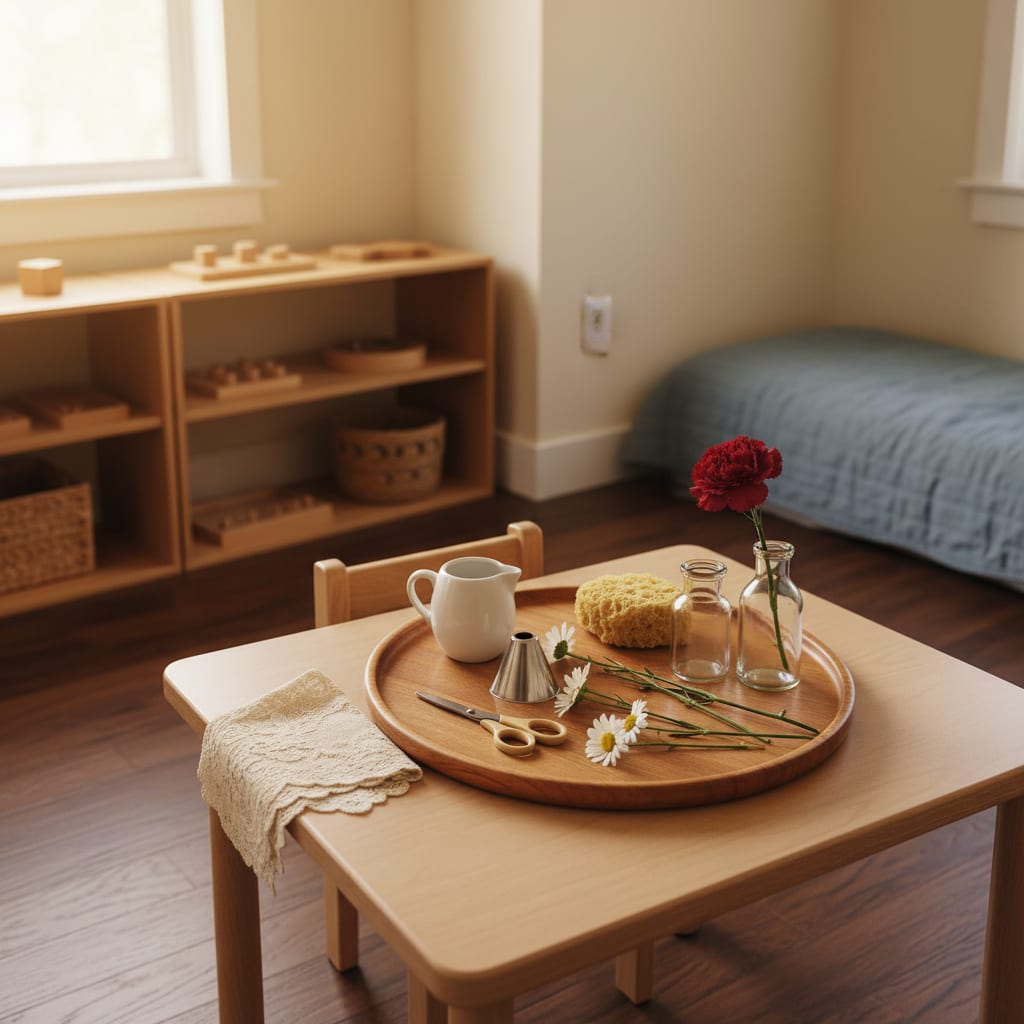
Montessori flower arranging is a classic practical life work in which a child — usually two and a half and up — fills a small vase with water from a pitcher, trims a stem or two, arranges the flowers, and places the finished vase somewhere it beautifies the room. The tray needs a small pitcher, a few bud vases, a funnel if the vase necks are narrow, blunt scissors, a sponge, and flowers. That’s the whole activity, and it’s survived a century in classrooms because it quietly bundles pouring, cutting, sequencing, care of the environment, and the slightly radical idea that beauty is a child’s job too. Here’s the home version.
Why a century of classrooms keeps this tray
On paper it’s just pouring with a bottleneck. In practice, flower arranging is one of the densest works on the shelf: a long sequence held in order (water, funnel, pour, trim, arrange, place, wipe), fine-motor work at three different grips, and a built-in gift — the finished vase goes somewhere, for someone. The child isn’t practicing for life; they’re contributing to the household right now, and toddlers can feel the difference between practice and the real thing.
It also carries the part of the method that gets flattened out of Instagram Montessori: grace, courtesy, and beauty as curriculum. A two-year-old carefully centering a slightly mangled daisy on the kitchen table is doing care of the environment in its most literal form. The classroom-side write-ups at Trillium Montessori cover the doctrine better than I can from the assistant’s chair — this post is the home logistics.
The tray, piece by piece
- A small pitcher — creamer-sized, holding just enough water for one vase. Portion control is spill control.
- Two or three small vases. Bud vases are ideal: a narrow neck holds one or two stems upright, so every arrangement succeeds. Charity shops sell them for roughly a dollar or two; sturdy shot glasses and small jam jars work fine.
- A small funnel if your vases have narrow necks — pouring through a funnel is half the fun anyway.
- Blunt-nosed scissors, like Fiskars’ blunt-tip kids’ scissors, for trimming stems, if your child has scissor experience. Skip them for a first presentation.
- A sponge and a cloth. Water will land on the tray. That’s what the tray is for.
- A doily or small mat to mark where the finished vase sits — the traditional touch, and a surprisingly effective one; the mat makes placement its own deliberate step.
- Flowers: a few short-stemmed, sturdy blooms. Carnations and daisy-family flowers (chrysanthemums, asters) are famously indestructible; a single supermarket bunch, stems pre-cut short, runs a week of daily work for a few dollars. Garden clippings and roadside weeds are entirely legitimate — dandelions have dignity on the right doily.
Skip anything toxic or thorny; if you’re unsure about a plant, check before it goes on the tray, and keep vase water away from toddlers who still drink adventurously.
Presenting it at home
Present once, slowly, mostly wordless — the same show-then-step-back rhythm as every tray. Carry the tray to the table. Pour water through the funnel. Place one stem, then another. Carry the vase — two hands, walking slowly, this is the dramatic bit — to its mat. Return, wipe the tray, done. Then it’s the child’s, repeats and all, and your job becomes the hard one: not fixing the arrangement. A vase with three flowers jammed at one angle is a finished work; rearranging it while the child watches un-teaches everything the tray just taught.
Refresh the tray between sessions like any other practical life station — water topped, dead blooms out, sponge wrung. When the flowers finally give out, composting them is a worthy final errand.
Variations through the year
This is naturally a rotating seasonal work rather than a permanent resident of the shelf. Spring runs on garden clippings and blossom prunings; summer on whatever the walk home offers; autumn swaps flowers for seed heads and sturdy leaves; deep winter can go evergreen sprigs — which is roughly when this site’s holiday shelf traditions pick up the same idea. For a huge collection of the community’s flower and nature-tray variations gathered over many years, Living Montessori Now is the archive I keep going back to.
Older children extend the work on their own: measuring stems against the vase before cutting, arranging for someone specific (“this one’s for Grandma’s call”), or pairing it with learning flower-part names — at which point a practical life tray has quietly become botany, which is very much how the method likes to sneak around.
FAQ: Montessori flower arranging
What age is flower arranging for?
Most children manage the full sequence somewhere around two and a half to three, with scissors-trimming added once cutting skills exist. Younger toddlers can do a simplified version — one stem into a pre-filled heavy vase — as early as eighteen months-ish.
What flowers work best for Montessori flower arranging?
Sturdy, short-stemmed, non-toxic blooms: carnations are the classroom classic because they survive enthusiastic handling, and chrysanthemums and daisies are close behind. Garden and wildflower clippings are free and completely traditional.
Do I need a special flower arranging set?
No. A creamer, thrifted bud vases, a small funnel and a sponge on any tray with a lip is the entire kit — roughly $5–15 assembled secondhand. Beware anything marketed as “Montessori-certified”; no such certification exists, for this or any product.
What if my child just dumps the water out?
Then the work on offer is currently pouring, not arranging — meet that instead with dedicated pouring work and a smaller pitcher here, and re-present flower arranging in a few weeks. Dumping is information, not defiance.